

How To Set Default Hard Drive Windows 10
On Windows 10, when connecting a new internal or external hard drive, it's of import to spend the time to format it before storing files. You want to do this to make sure that the drive is empty, working as expected, and costless of malware that might otherwise harm the electric current setup and files. Information technology'southward too of import to format the storage to ensure that it's using the proper settings to avoid compatibility problems.
Whenever yous format a hard drive, the data volition be deleted, since part of the process includes purging the file organisation table that tracks the locations of the files written on disk. The process will and so ascertain the area where files will be stored, and a compatible file system (such equally NTFS, FAT32, or exFAT) will be applied to organize the new content. The system will go on to detect the previous data, simply it'll identify that data as available infinite to shop new data.
Windows 10 includes many methods to format a difficult drive, simply using Deejay Management is possibly i of the best options for most users.
In this Windows 10 guide, nosotros'll walk you through the steps to properly format a traditional hard drive or Solid-Land Drive (SSD), whether it already has a partition or was never initialized.
- How to format existing partition using Deejay Management
- How to create and format partition using Disk Management
How to format existing partition using Disk Management
When you're dealing with a drive that already has a segmentation, you lot tin can format the existing partition to delete its files and start with a clean storage.
To format a partition using Disk Direction, utilise these steps:
- Open up Start.
- Search for Create and format hard disk partitions and click the height result to open the Disk Management console.
- Right-click the new hard bulldoze and select the Format option.
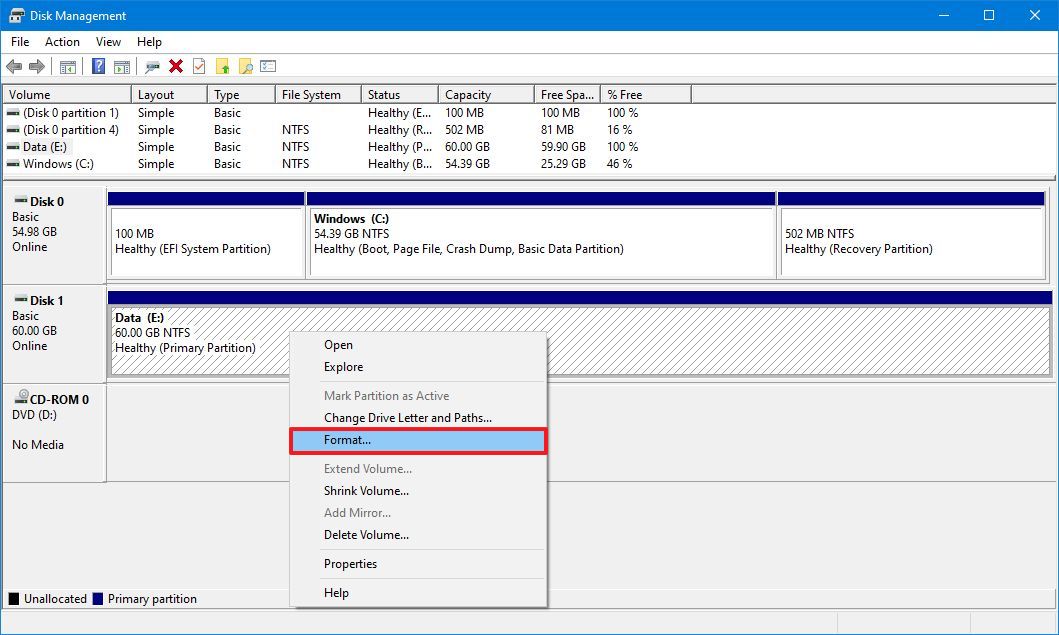
- In the "Value characterization" field, ostend a new name for the storage.
- Utilize the "File system" driblet-down menu, and select the NTFS option (recommended for Windows 10).
- Apply the "Resource allotment unit of measurement size" drop-down menu, and select the Default selection.
- Check the Perform a quick format option.Quick tip: The quick format option wipes the drive fast, only it doesn't check for problems. On the other manus, when immigration the selection, a full format will be performed, which non just wipes the bulldoze clean, but it'll also check for bad sectors. It'southward an option that could take many hours depending on the size, but it's a good do to make sure the drive is in working weather.

- Clear the Enable file and folder compression option.
- Click the OK button.
- Click the OK button again.
One time you complete the steps, the tool will format the selected sectionalization on the drive, and then yous can begin storing files.
How to create and format segmentation using Disk Management
In the case that you lot have a difficult bulldoze that was never partitioned and formatted, it will not announced in File Explorer, and you'll have to initialize, create a new division, and then format it before you can use it.
Unremarkably, yous can tell a hard bulldoze doesn't have a partition, because it volition non appear in File Explorer, and on Disk Direction, it'll show up as unallocated space.
To gear up a new difficult drive with raw space on Windows 10, utilize these steps:
- Open up Kickoff.
- Search for Create and format hard disk partitions and click the meridian effect to open the Disk Management console.
- Correct-click the difficult bulldoze marked as "Unknown" and "Not Initialized" and select the Initialize Disk option.

- Under the "Select disks" section, cheque the deejay to initialize.
- Select the sectionalisation manner:
- Principal Kicking Record (MBR) for hard drives smaller than 2TB in size.
- GUID Sectionalisation Table (GPT) for difficult drives larger than 2TB in size.
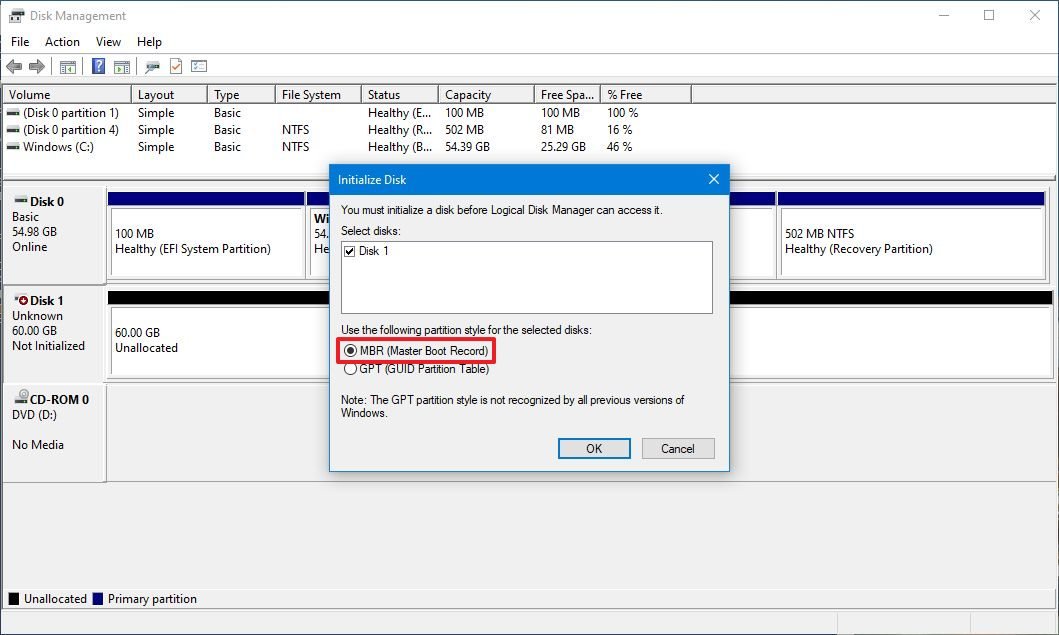
- Click the OK button.
- Right-click the Unallocated infinite part of the storage, and select the New Only Value option.
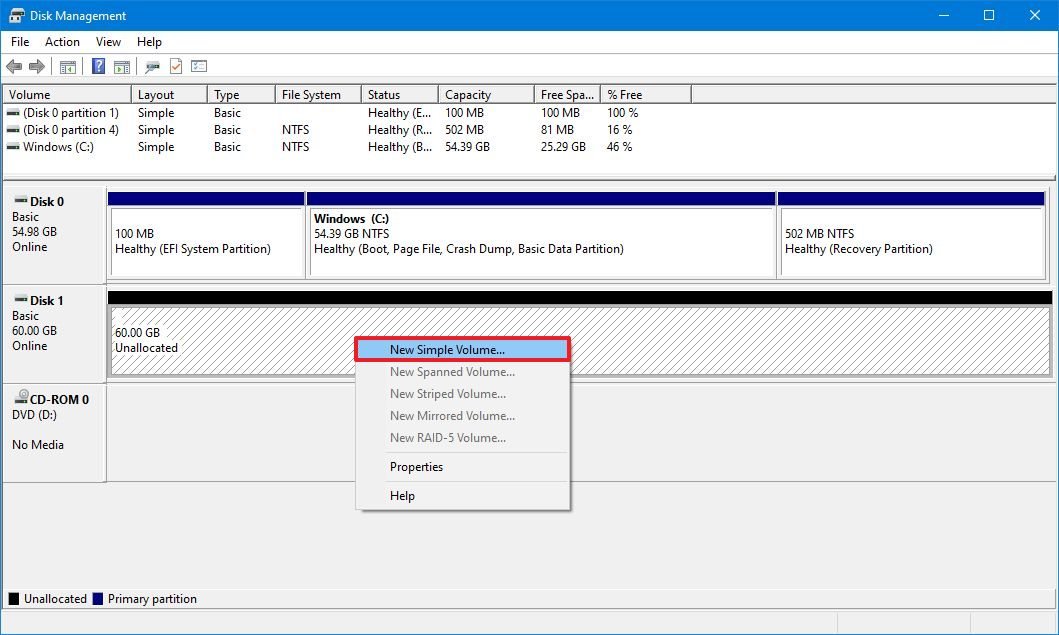
- Click the Adjacent button.
- Under the "Elementary volume size in MB" section, leave the default size if you're planning to use the unabridged difficult bulldoze to shop files. Otherwise, specify the amount of space in megabytes you want to allocate for the sectionalization.
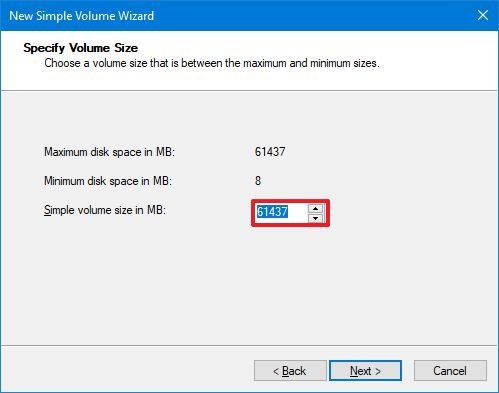
- Click the Adjacent push.
- Use the "Assign the following drive alphabetic character" driblet-downward carte to select a new drive alphabetic character.
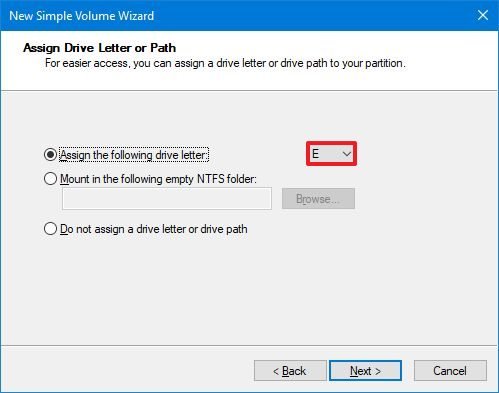
- Click the Next button.
- Use the "File system" drop-down bill of fare, and select the NTFS option (recommended for Windows 10).
- Use the "Allotment unit size" drib-down menu, and select the Default option.
- In the "Value label" field, type a descriptive name for the storage.
- Check the Perform a quick format selection.Quick tip: To perform a full format that includes a disk cheque, articulate the quick format option. If you employ the full format pick, remember that it can accept many hours to complete depending on the size.
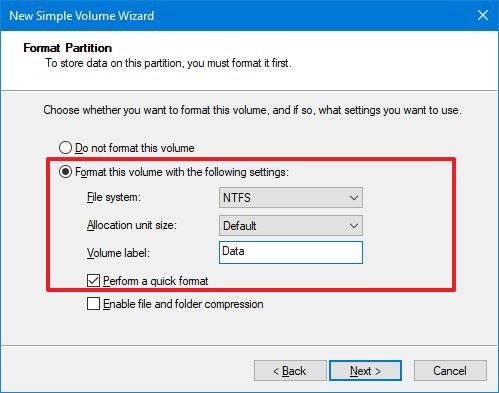
- Articulate the Enable file and folder compression pick.
- Click the Next button.
- Click the End button.
After you complete the steps, the new hard drive will be initialized, partitioned, and properly formatted.
If the drive is exhibiting problems using the Disk Management tool, as a consequence of data abuse or some other upshot, y'all can use the DiskPart command-line tool to resolve the problem.
We're focusing this guide on Windows 10, but these instructions should also work on Windows 8.1 and Windows 7.
Source: https://www.windowscentral.com/how-format-new-hard-drive-windows-10
Posted by: shipleywatiod.blogspot.com
0 Response to "How To Set Default Hard Drive Windows 10"
Post a Comment