

How To Test Ram Windows 10
How to test RAM and discover errors
Bad memory
Gaming PCs are, unfortunately, no more resistant to memory mishaps than any other type of computer. Simply if y'all learn how to test RAM for errors, you can at least effigy out the true cause of a crash or a booting fault, in turn opening upward the chance to detect a set up (or just letting yourself know that you lot need to buy new RAM).
In this guide nosotros'll become over a couple of different RAM testing tools, both free to download and use. The first, Windows Retentivity Diagnostic, is congenital right into Windows (including Windows xi) and offers an easy pick for finding possible RAM problems. For a deeper investigation, you lot tin can also try MemTest86, which requires a scrap more than legwork (including some BIOS changes) only volition more thoroughly search your RAM for errors.
How to test RAM using Windows Retentivity Diagnostic
This is your simplest and easiest option if you don't fancy installing whatsoever other tools, equally everything is built into Windows. However, you'll need to block out some time for it; the tool itself claims its usage "might take several minutes", but can actually take shut to an hour, and you won't be able to use your rig commonly during that fourth dimension.
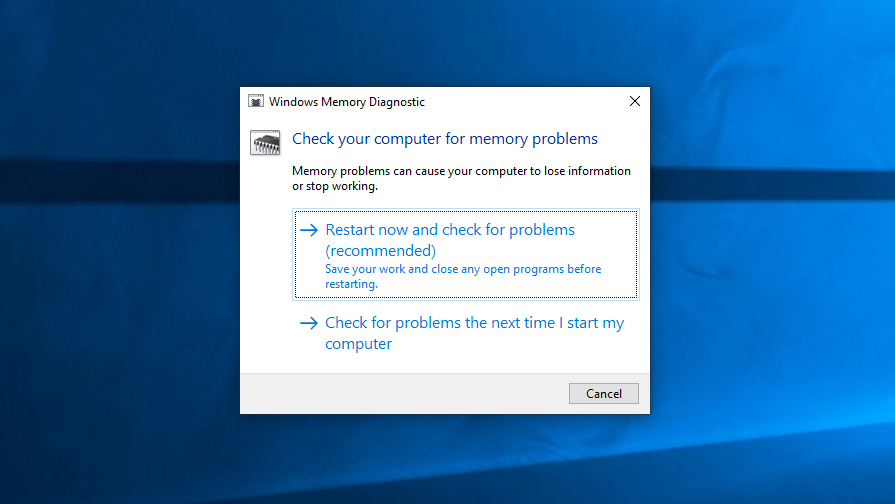
Pace one: Open up Windows Memory Diagnostic past searching for it in the Commencement menu's search bar. Then, click "Restart now and check for problems".
Step 2: Your PC will close down and yous'll be treated to the sight of a blue screen for many, many minutes as Windows Memory Diagnostic searches for RAM bug. Y'all tin can get off and do something more productive, as your input isn't required at this stage, though it's worth checking on information technology sporadically as the tool volition say if it's establish a problem.
Step 3: Once the test pass is consummate, you'll return to your desktop. Windows Memory Diagnostic should apparently brandish its results automatically at this signal, though it didn't when I tried it. Luckily, y'all can find a recap in Windows'south Effect Viewer.
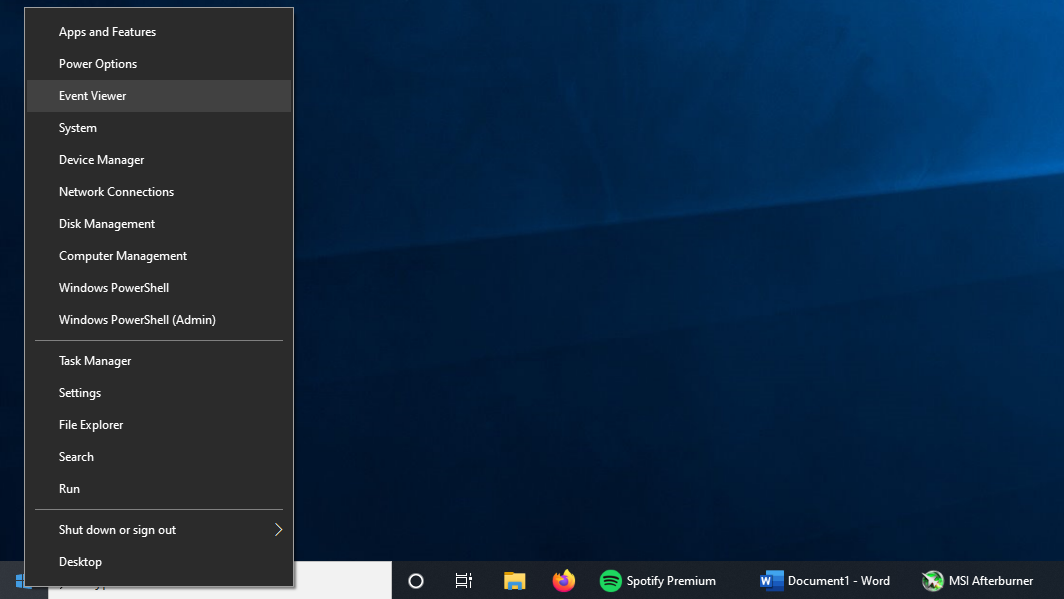
Step 4: Right-click the Windows icon then click "Result Viewer".
Stride 5: In Result Viewer, navigate to Windows Logs > System in the leftmost pane, and so look in the "Source" column for an upshot named "MemoryDiagnostics-Results". This will detail the results of the examination in the pane at the bottom.
.png/BROK/resize/690%3E/format/jpg/quality/80/how-to-test-ram-with-windows-memory-diagnostic-step-5-(2).png)
How to exam RAM using MemTest86
Of all the free memory test apps, MemTest86 should be the just ane yous need. It runs a more thorough set of tests than Windows Retention Diagnostic and, because information technology boots from a USB drive, can bypass the Os entirely – handy if your crashing problems are so bad yous can't even reach your desktop.
Step 1: Head to the MemTest86 site and click "Download".

Footstep 2: Extract the .zip file you've but downloaded and plug in a USB drive. Setting up MemTest86 will wipe everything else off the drive, so if it's non already clean, back up its contents.
Step 3: Launch the "imageUSB" executable in the extracted folder. When asked if you want to allow it to make changes, click "Yes".

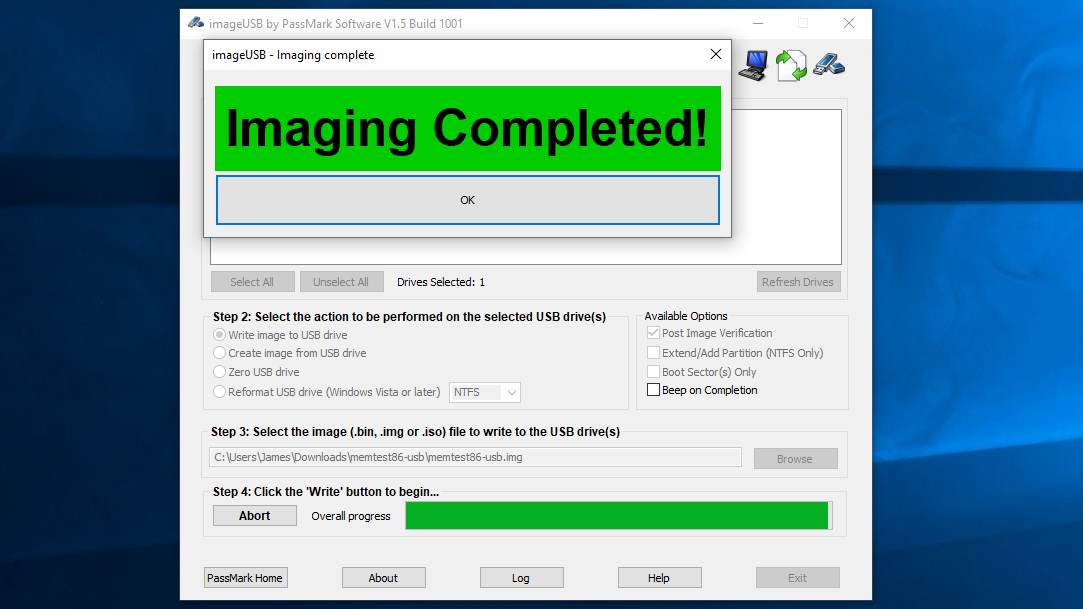
Step 4: Select your USB drive from the list in the "Step 1" box. In the "Step 2" department, make sure "Write paradigm to USB drive" is selected, then in the "Pace 3" section, check that the memtest86-usb.img file is selected – it should exist already. Finally, click the "Write" button, so "Aye" on the next two dialogue boxes to ostend.

Pace 5: After a few moments the image volition have been written to the USB – you'll know considering you'll get a large flashing, slightly GeoCities confirmation message. Hitting "OK" and either restart your PC, or if you've used a unlike calculator to create the USB image, plug the USB bulldoze into the PC you want to test and kicking it upwards.
Stride half dozen: Your PC will default to booting Windows rather than from the USB, then you'll need to bound into the BIOS (or UEFI, if we're being technical) and set up the USB as the main boot device. You can exercise this by pressing F2, F12 or the Del primal every bit your PC boots up, depending on the motherboard manufacturer.
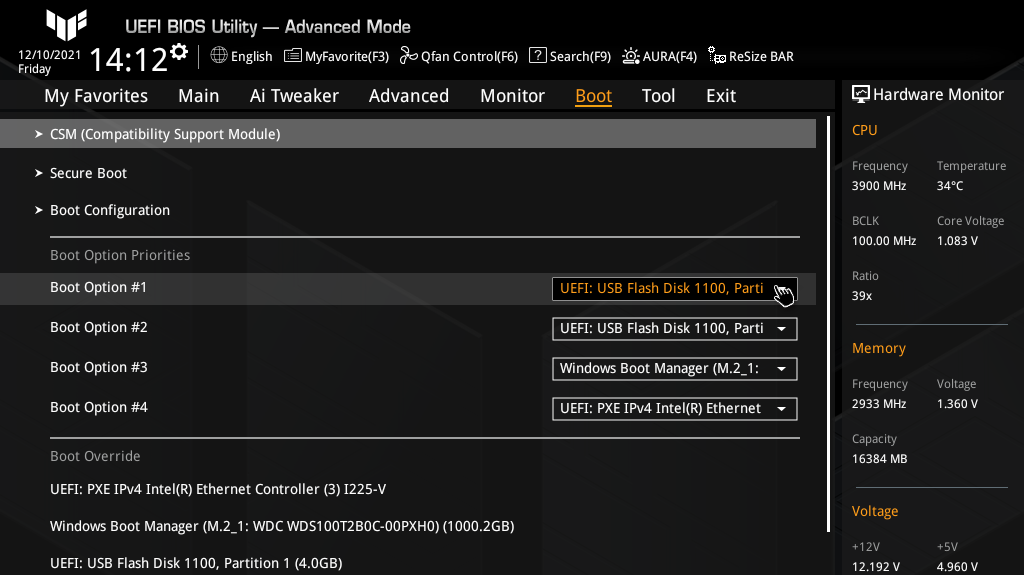
BIOS interfaces can differ but they usually take a Boot menu, so navigate to this and set any USB drive partitions to the top of the boot priority order list. You tin e'er change this back later you've finished testing. Savr your changes and exit to restart.
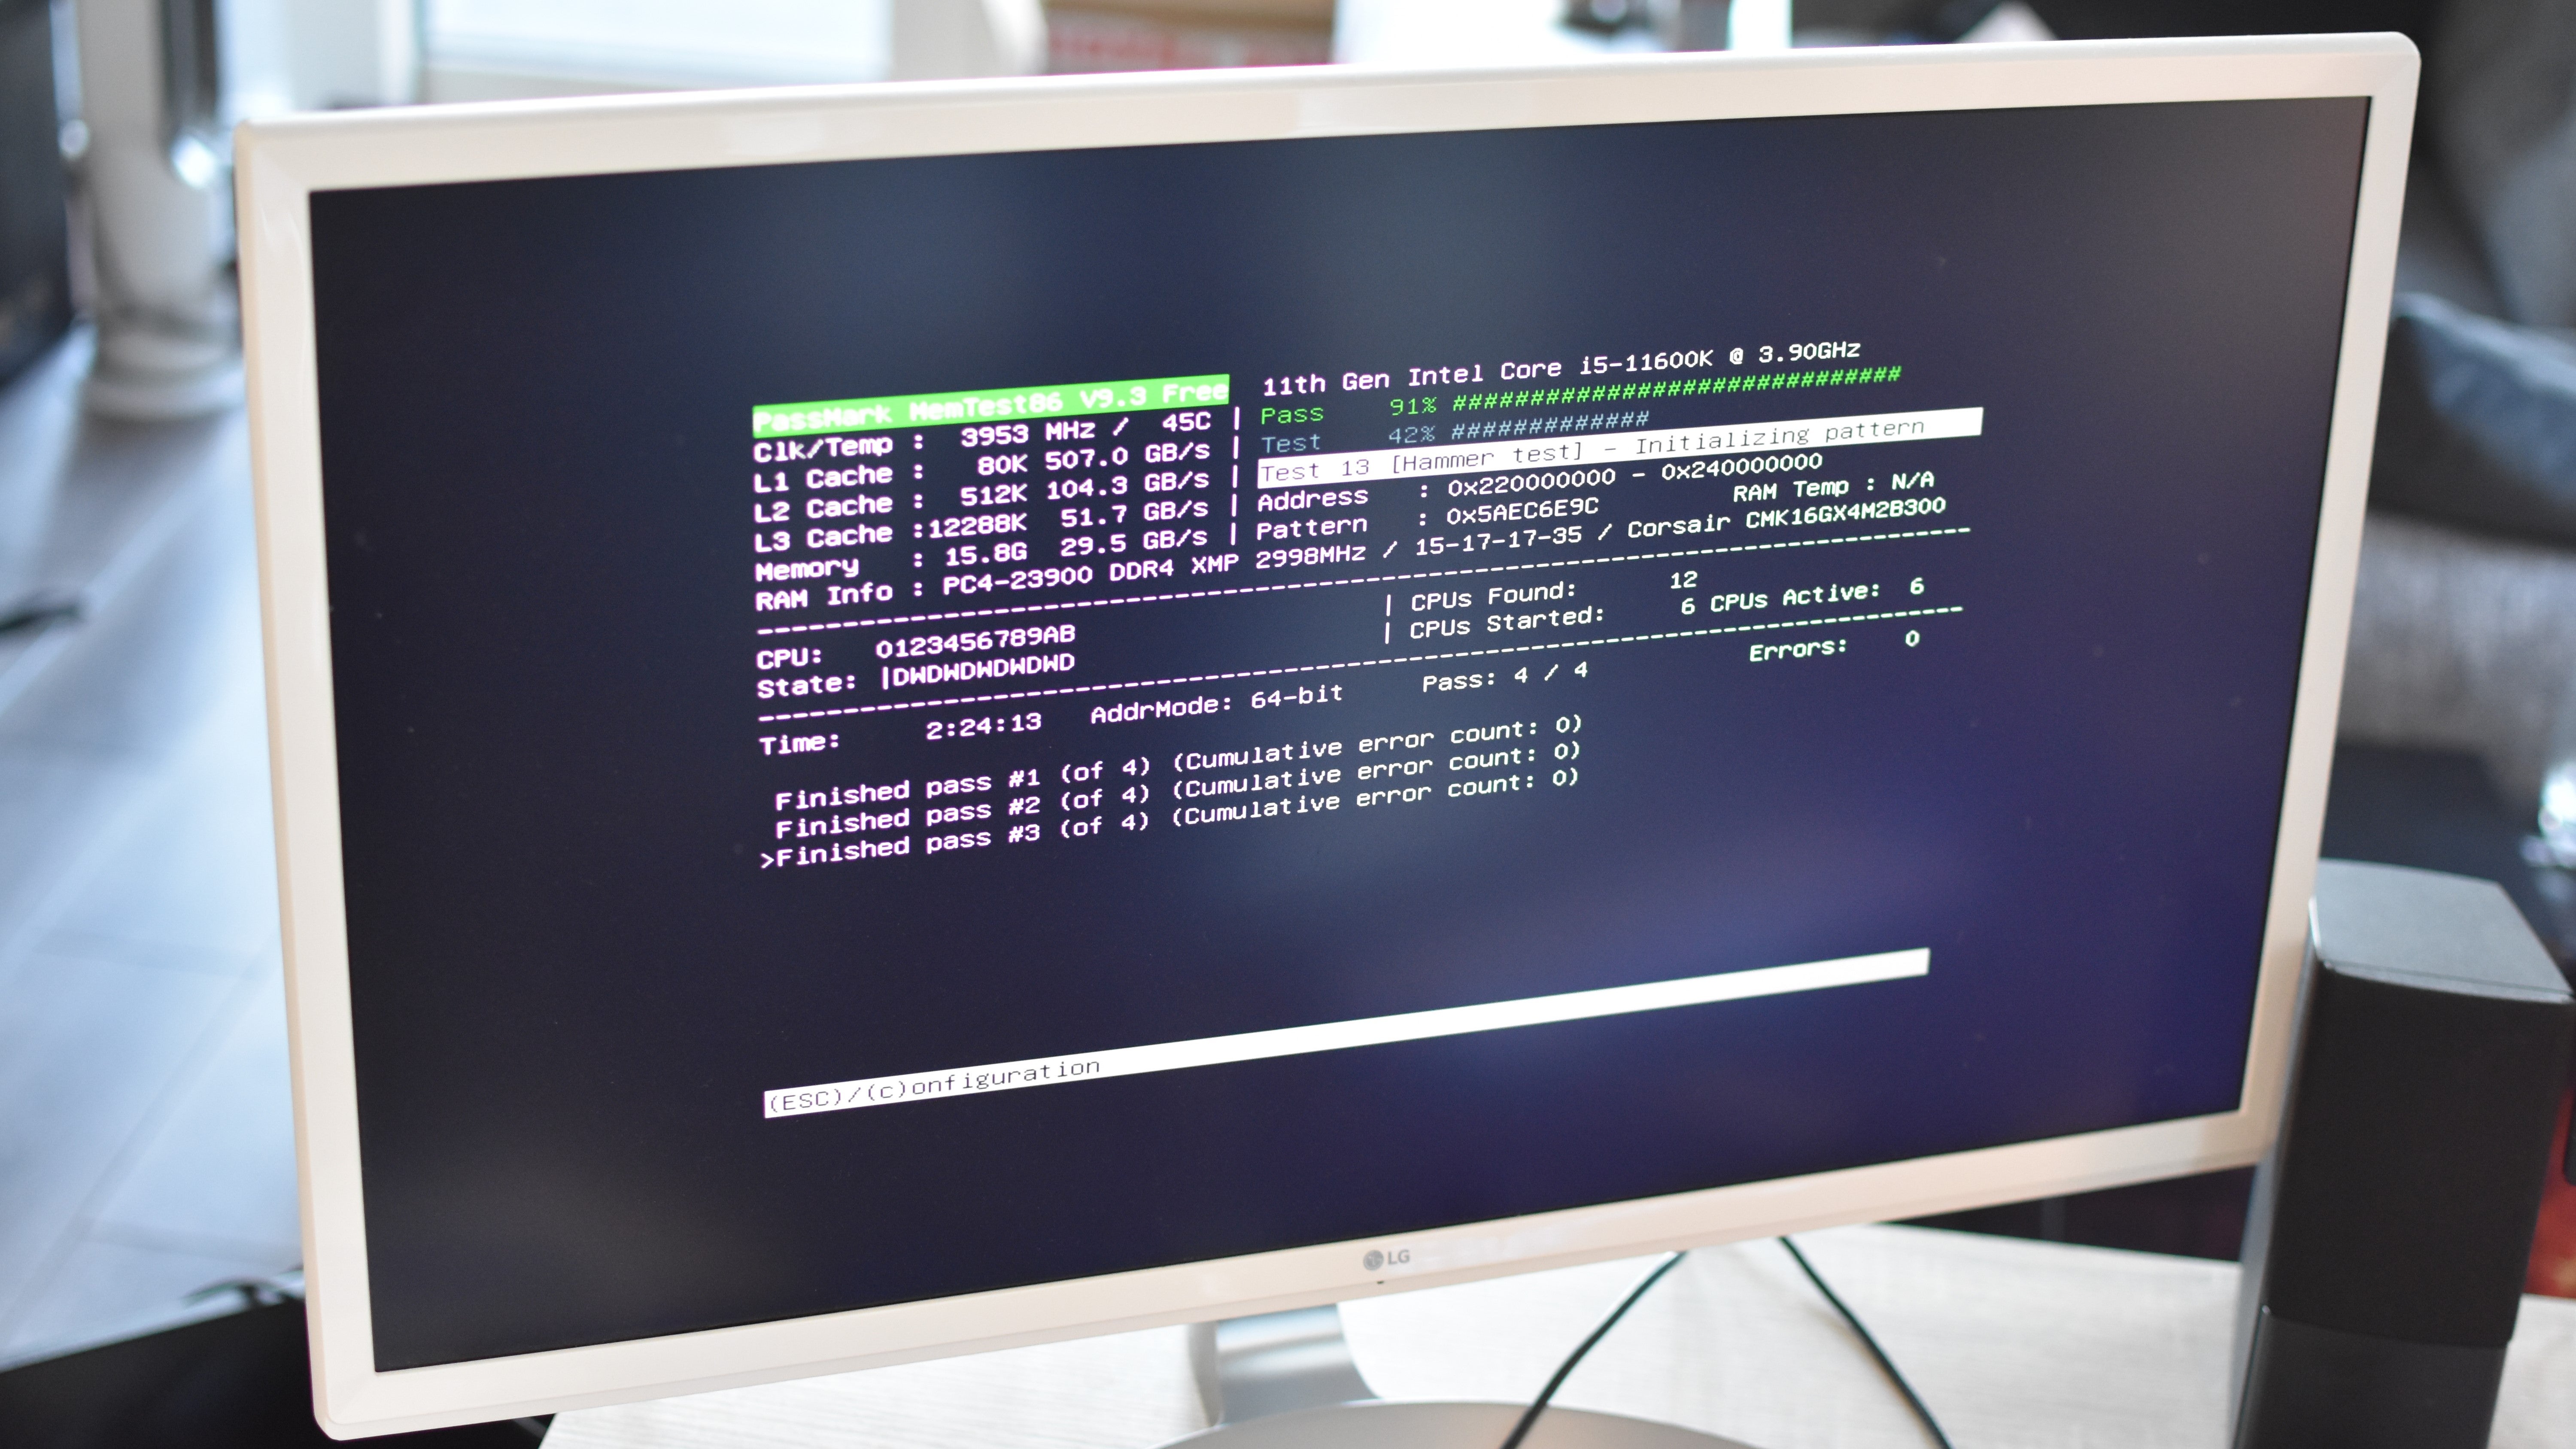
Pace 7: On restarting, your PC will load up MemTest86, which will commencement running automatically. It will have a while to finish the default iv-pass testing run – two and a half hours when I tried information technology with 16GB of DDR4 – so let it do its matter, and upon completion, press any key to view the results. If y'all like, y'all can press the Y fundamental when prompted to save a copy to an HTML file, for future reference.
Step 8: Press the 10 key to exit. You tin can choose to restart, close downwardly your PC or get out MemTest86, though remember that you'll keep loading into it (rather than Windows) until you remove the USB bulldoze or re-enter the BIOS to set Windows Boot Manager back to the primary boot choice.
How do I gear up RAM errors?
Sadly, not all retentiveness errors are fixable. If there'south a serious hardware problem with i of your RAM sticks, you won't be able to mend it with troubleshooters, and are best off just replacing it.
That being said, you can gear up some bottom errors past reseating the RAM: the PC retention equivalent of turning it off and on once again. Only remove your RAM sticks from the motherboard, immediately re-install them, and try booting again to see if they behave ameliorate. Our guide on how to install RAM might help if you haven't done this before.
And even when ane of your RAM modules is terminally cleaved, if you have more than than ane stick in your motherboard y'all don't demand to throw them all out. Effort repeatedly booting your PC while removing a different RAM stick each time; if you stop experiencing errors, you'll know which module needs replacing and which ane(s) you lot can keep.

How To Test Ram Windows 10,
Source: https://www.rockpapershotgun.com/how-to-test-ram
Posted by: shipleywatiod.blogspot.com
0 Response to "How To Test Ram Windows 10"
Post a Comment